Electrical & Control Installation
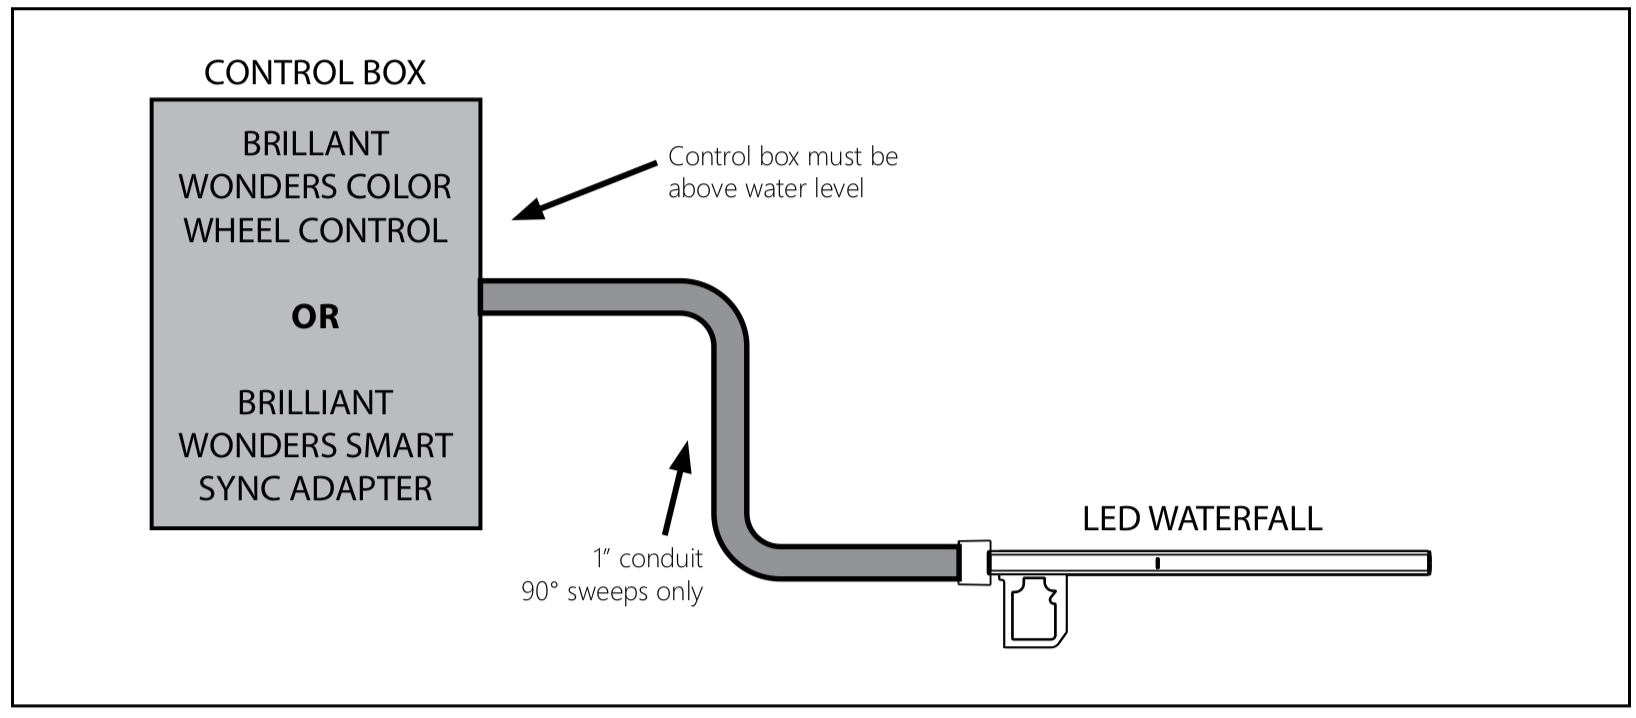
Conduit Installation
Install power cable through 1” conduit. Use only sweeps, no 90° elbows. Control box must be above water level. Connect cable to Brilliant Wonders Color Wheel Control, or Brilliant Wonders Smart SyncAdapter.
Control Setup Options
![]()
There are two options for controlling the LED Waterfall. The Colorwheel Control is a complete stand-alone control system for the waterfall. The Smart Sync Adapter is used to control the LED Waterfall with most major pool automation systems. The Color Wheel Control and Smart Sync Adapter are incompatible and should not be used together.
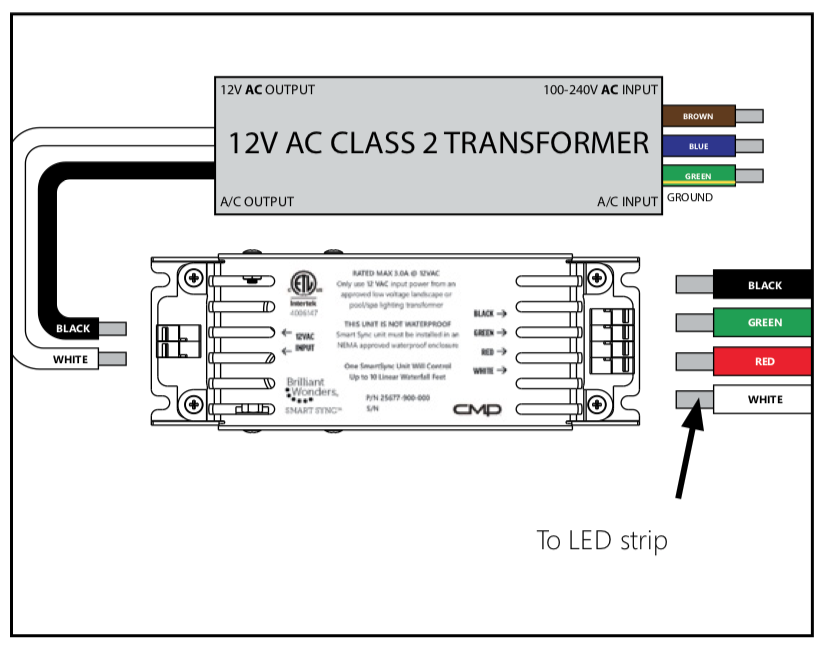
Brilliant Wonders Smart Sync Adapter
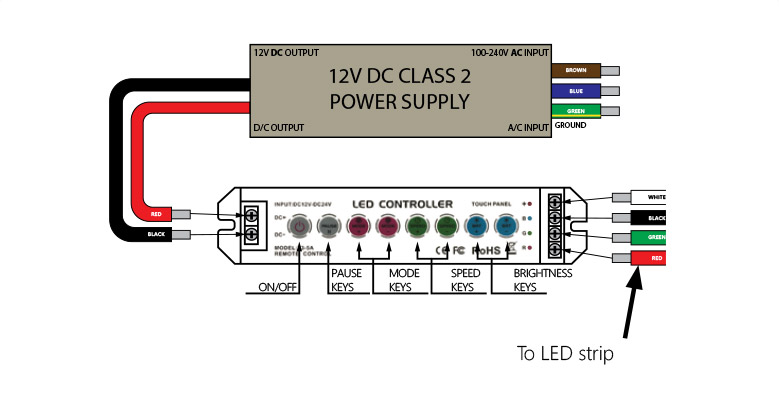
Brilliant Wonders Color Wheel Control
The Color Wheel control is a 12V DC system; Requires a 12V DC power supply (sold separately).
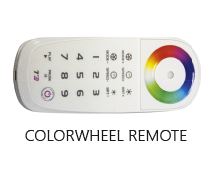
The remote control has 18 function buttons and 1 full-color touch circle.
The controller has 8 touch buttons.

Controller Installation & Wiring
- The enclosure or junction box must be installed per the National Electric Code (NEC) requirements as well as comply with any local codes and regulations
- All wire used from the controller box to luminaire must be in conduit.
- Min size of controller box must be 9″ x 2″ x 1.5″.
- The enclosure must be non-metallic(plastic) to ensure adequate RF signals are achieved.
- For product longevity, ensure proper ventilation where both the controller and power supply may be mounted inside the same enclosure in elevated outdoor temperatures.
DO NOT INSTALL ANY OTHER ITEM INSIDE CONTROLLER ENCLOSURE.
Remote Pairing & Charging
- Press the “ON/OFF” key on the controller until you hear the “BEEP” sound, then press the “1” key on the remote to activate the connection between the controller and remote control. Press the “2” key to cancel the connection.
- When charging, connect the USB cable to the mobile charger or a computer with USB interface. The remote control must be turned on to charge.
- The blue indicator light flickers while charging, and will turn green when fully charged
- No memory effect in the lithium battery of the remote control. Follow the standard charging procedure even for the first three charges. There is no need to overcharge.
- The red indicator light flickers when the battery is low and needs to be charged soon. Charging in low battery will affect battery life.

Color Control Operation
Smart Sync Adapter Setup
Brilliant Wonders Smart Sync Adapter requires a 12V AC transformer (not included). Use Smart Sync Adapter option for Waterfalls installed with other LED products or automation.
Select Smart Sync Mode
Using a flathead screwdriver, turn the dial until the desired program is selected.
J-Style = Dial Setting 1
H-Style = Dial Setting 2
P-Style = Dial Setting 3

Install in Outdoor Box
Mount Smart Sync control box in a NEMA approved weatherproof enclosure (mounting screws not included).
Recommend CMP Part #: 25650-100-210
Smart Sync Adapter Wiring
Attach wires to control box by pressing button and inserting wires.
Smart Sync System Wiring
![]()
Wiring of the system will vary depending on the total length of waterfalls installed as well as the total number of waterfalls installed.
Diagram for two waterfalls
Diagram for over 10ft of waterfalls
Diagram for waterfalls with other lighting products

Smart Sync Wiring with One Waterfall Under 10ft

Wiring Two or More LED Waterfalls

Wiring over 10ft of LED Waterfalls

Wiring LED Waterfalls with Other LED Products
![]()
Congratulations!
You have completed this chapter. To go to the next chapter, click next. To go back to the Chapter Table of Contents, click done.