Generator Cell Installation
Before you Begin
Do not install on pools using a stainless steel liner or stainless steel plumbing.

Flow Rate vs Head Loss
Evaluate the total head loss, and any impact that head loss may have on the design of an existing plumbing system.

Install Cell Housing in Plumbing
Position pool return line after the heater or filter. This is the preferred location for the cell housing.
Cut and glue the vertical plumbing risers from the main plumbing into place.
For Powerclean Salt Ultra cells: Install union nut and tailpiece onto pipe. Use included template to set pipe spacing.
Install the cell housing to the top of the risers, making sure the cell housing is level.
Select Cell Orientation
![]()
The salt cell should be installed as the last piece of pool equipment in line, on the return to the pool and after the heater.
Vertical Installation
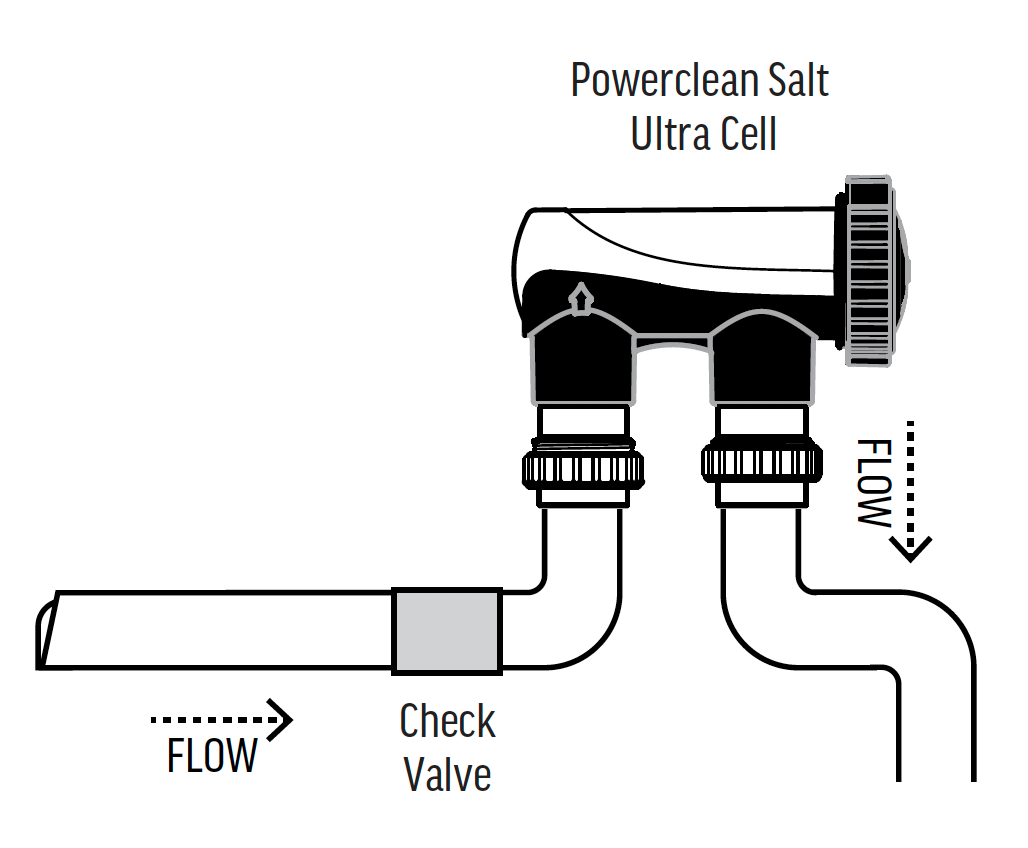
Horizontal Installation
Installing horizontally will ensure the flow sensor remains submerged.
Always use a check valve before the cell to prevent chlorine backflow.
All fittings are 2 inch Socket.
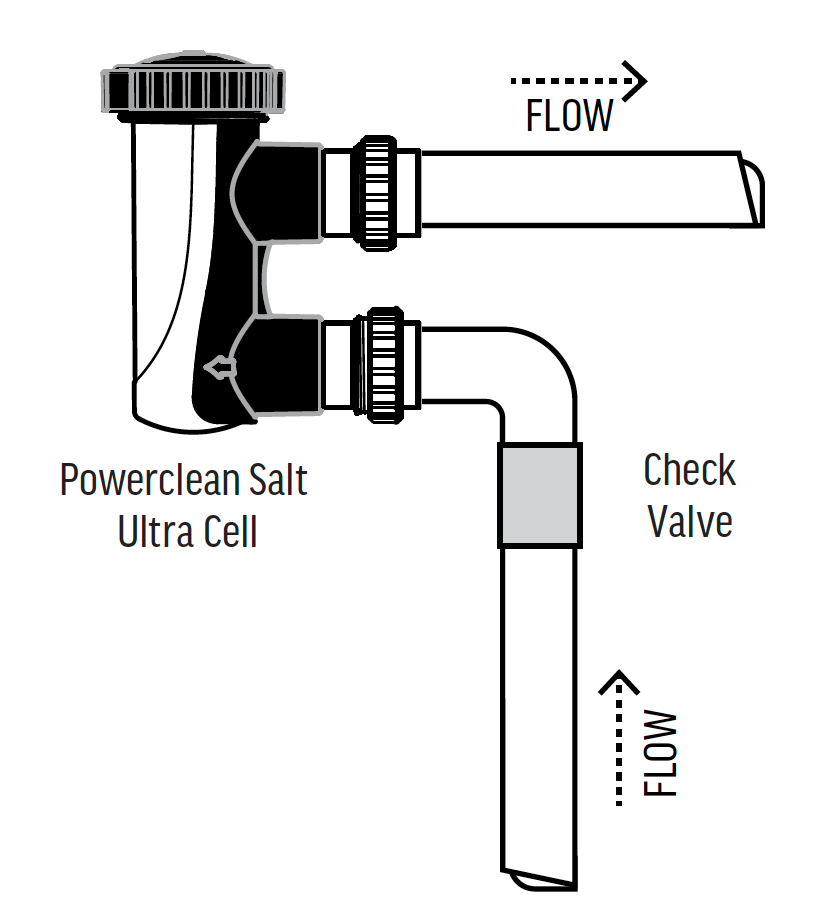
Vertical Installation
If installed vertically, the cell cap must be on top.
Always use a check valve before the cell to prevent chlorine backflow.
All fittings are 2 inch Socket.
Select Grade Installation
![]()
Below grade installation exists when the water level of the pool is above the height of the pool equipment.
Standard (Above Grade) Installation
Below Grade Installation
The system should be wired to the load side of the time clock to power on ONLY when the primary pump is operating.
If valves are not present to isolate the equipment, one ball valve should be installed on the inlet side of the cell. This allows the cell to be removed for cleaning when necessary.
A one-way check valve should be installed on the outlet side of the cell. This will eliminate the possibility of having a gas build-up (which could cause possible cell damage.)
Failure to follow proper below grade installation procedures may lead to damage to pool equipment.

Insert Salt Cell into the Housing
Install the O-ring into the receiving channel inside the cell housing. DO NOT use any type of lubricant on the O-ring.
The O-ring (and the channel it seats into) must be kept clean, in order to make a strong seal.
Slide the cell into the cell housing making sure the keyway on the black plastic base aligns with the matching key in the cell housing.
Put the main cap into place and hand-tighten only.
Connect Cell to Control Center
Align the three pins of the cell cord plug with the socket on the Control Center bottom.
Insert the connector until it clicks in place.
![]()
Congratulations!
You have completed this chapter. To go to the next chapter, click next. To go back to the Chapter Table of Contents, click done.