plumbing
CONSTRUCTION DEBRIS COVER
Each unit is carefully packed with a construction debris cover that prevents most construction contamination prior to operation.
Use the debris cover as instructed to prevent damage to the bubbler.
PREP THE LIGHT MODULE
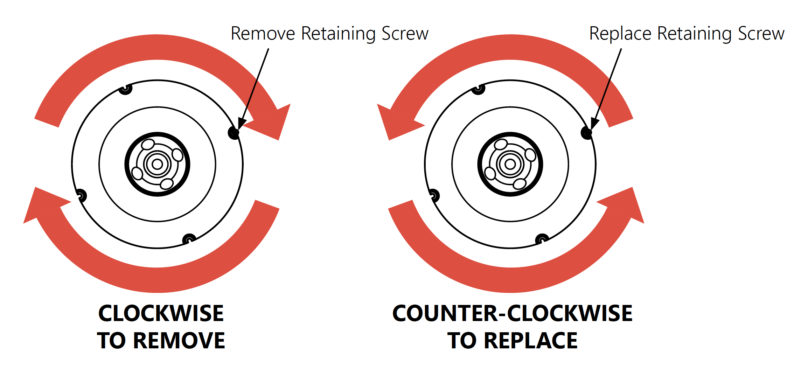
First, remove the light module from the body.
Start by removing the LED Module Restraining Screw, and then turn the light module CLOCKWISE to remove.
Install the debris cover, and then put the light module in a safe place until ready for the final installation.
DETERMINE INSTALL LOCATION
Determine the location(s) for installing the Brilliant Wonders 8″ LED Bubbler(s).
The unit can be installed in various positions from the typical horizontal mount or used as in a vertical wall mount.
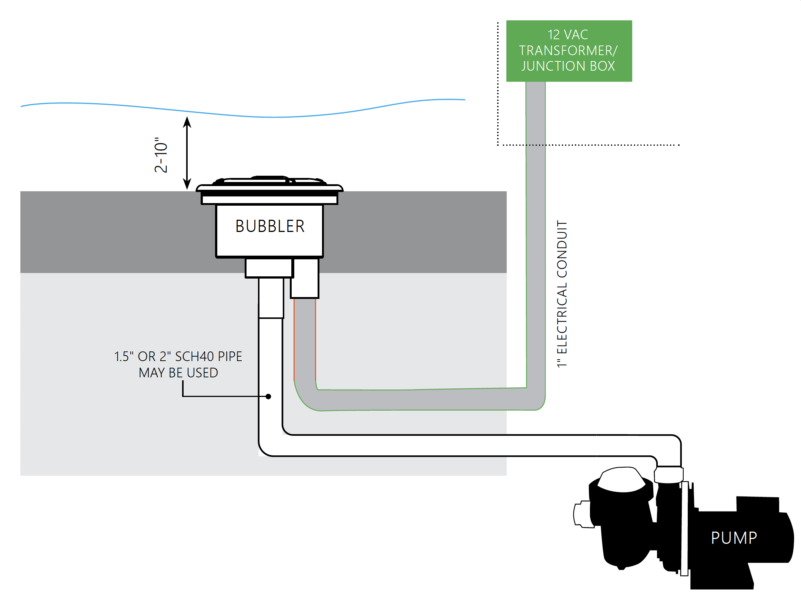
NOTE: Install the control box at least two (2) feet above the water level.
PREP INSTALL LOCATION
Begin by prepping the area for installation as you would a main drain sump.
There is a 1½” – 2” PVC combination socket located on the bottom of the body of the bubbler to run water service.
There is also a 1” PVC slip socket on the bottom to run conduit for electrical connections.
For the best combination effect of water and light, CMP recommends mounting the bubbler no more than 14” below the surface of the water horizontally when installed as a bubbler/fountain.
LIGHT USE ONLY
When using the unit as a light only, glue a plug into the water port on the back of the body.
Then, thread the Light Use Only Cap onto the front. (P/N 25552-309-300)
If the bubbler is mounted on a vertical wall, the unit will act more like a lighted jet and will not give the same effect as a horizontal application.
INSTALL THE LIGHT
Install the light module and run the cord through the conduit to the junction box.
Then, install the “hold down” screw.
PLUMBING THE WATER LINE
NOTE: Flush the pipe prior to installation.
Complete the rough-in by plumbing the water line to the desired pumping system.
Prior to startup, flush the water line to remove any foreign material from construction that may be inside the system.
Install an in-line flow control valve to adjust the height and flow of the water.
![]()
Congratulations!
You have completed this chapter. To go to the next chapter, click next. To go back to the Chapter Table of Contents, click done.